Dragon’s dogma
Содержание:
Tactics
Combat
- Fighters possess devastating close quarters swordplay skills. Attacks such as Dragon’s Maw, Burst Strike and Soul Skewer can easily quell most foes in one to three strikes. Dragon’s Maw is a must have skill to quickly decimate a large monster and is especially effective when focusing on a weak spot of a downed monster.
- Traveling with a powerful Sorcerer is an excellent addition to the Fighter’s play style. While the Fighter draws enemies toward him or herself, this gives ample time for the Sorcerer to charge up devastating magical attacks. This tactic is especially useful in all large monster battles.
- The Soul Skewer and Blink/Burst/Blitz Strike skills are very useful for stopping the movement and knocking down any monster up to the size of a Saurian, while dealing good damage. Useful for those annoying Wolves.
- Sheltered Assault/Fusillade is a very good skill for attacking a boss in the middle of an attack. It may burn up more stamina but you will be safe while stabbing at the boss.
- Shield Strike/Storm is perfect for breaking the guard of any enemy.
- Skyward/Heavenward Slash is useful for knocking low flying enemies from the sky and attacking tall enemies, like the Goat’s head of a Chimera.
- Tusk/Antler Toss is good at quickly knocking down foes, making it easy to follow up with a heavy jump attack.
- If you find yourself needing better defenses and shield strength use some augments from the Mystic Knight class to obtain them. Fighters will also benefit from the defensive and offensive augments of the Warrior class.
- The Fighter’s heavy jump attack strikes twice on hit, which is very effective on enemies that are knocked down, as well as being able to keep the enemy on the ground.
Other
- Use of powerful skills such as Dragon’s Maw uses up Fighter’s limited stamina pool quite quickly — luckily the game provides ample sources of said curatives such as mushrooms which are just about everywhere you will be adventuring. Take advantage of this and other resources when adventuring.
- When launched by a Fighter Pawn’s shield skill Launchboard you will automatically grab any monster you touch, so you don’t need to press «grab», it does it for you.
Inhabitants
Before completing Of Merchants and Monsters, the quarry contains half a dozen Bandits near the Abandoned Mine, whilst the galleries of the mine contain several Undead and Undead Warriors as well as Giant Bats. Side passages near the western exit contain several Goblins. The most dangerous creatures in the mine are three Ogres who have made their homes in the passages.
Other minor creatures include Snakes, Rats, and Spiders. If Of Merchants and Monsters is not completed, the Ogres do not return, even after many moons, but the lesser creatures will return.
During the quest The Wyrmking’s Ring, Salomet and his Bandit allies may also be encountered in the mine.
People
After completing Of Merchants and Monsters, the mine becomes populated with people: all have escort quests that will be posted on the notice board at the Union Inn in Gran Soren. The guards want to go to Bloodwater Beach, and they offer some decent rewards. The miners want to visit the Shadow Fort but they offer only mediocre rewards.
- Alon — specializes in some heavy armor, as well as other melee weapons, and some preserved items.
- Nilson and Robyn — miners
- Ser Samwell and Ser Constans — guards
Basic Vocations
Fighter
The Fighter provides great Defensive stats at the expense of Magick and Magick Defense. It also sports good Offensive stats early on.
| Health | Stamina | Attack | Defense | Magick Attack | Magick Defense | |
|---|---|---|---|---|---|---|
| Under Lv10 | 30 | 20 | 4 | 3 | 2 | 2 |
| Lv10+ | 37 | 15 | 4 | 4 | 2 | 1 |
| Lv100+ | 15 | 5 | 1 | 3 |
Strider
The Strider provides a consistent balance of stats across the board, and boasts above-average stamina.
| Health | Stamina | Attack | Defense | Magick Attack | Magick Defense | |
|---|---|---|---|---|---|---|
| Under Lv10 | 25 | 25 | 3 | 3 | 3 | 2 |
| Lv10+ | 25 | 25 | 3 | 3 | 3 | 2 |
| Lv100+ | 5 | 15 | 1 | 1 | 1 | 1 |
Mage
The Mage provides good Magick offense and defense, at the expense of Physical Offense, Defense and Stamina; Mage has the lowest cumulative stamina growth of all vocations, and has very poor comparative hit point and stamina growth from level 10-100 — other vocations with equivalent attack/defense growth score an additional 20 Health/Stamina growth points per level comparatively.
| Health | Stamina | Attack | Defense | Magick Attack | Magick Defense | |
|---|---|---|---|---|---|---|
| Under Lv10 | 22 | 20 | 2 | 3 | 4 | 3 |
| Lv10+ | 21 | 10 | 2 | 1 | 4 | 4 |
| Lv100+ | 10 | 10 | 2 | 2 |
Notes
- Striders get a ~66% increase in damage (compared to other daggerists) when climbing certain large foes — however the boost is not universal.
- There’s a boost vs Gazer, Drakes, Golems, and the Ur-Dragon
- There’s no boost vs Cyclops, Ogre, or Ox.
Equipment
The Equipment of the Strider in the Change Vocation Menu is:
- Criteria / Shortbow
- Assembled Vest / Chestguard
- Assembled Sleeves
- Bandit Stalkers / Assembled Breeches
- Shed Cape
Trivia
The vocation’s name may be a reference to the Capcom video game franchise character, Strider Hiryu, although the name «Strider» is used interchangeably for Aragorn II in the Lord of the Rings books written by J.R.R. Tolkien.
Description
A more common type of dragon known as a Drake
The Red Drake is one of the smaller cousins of the titular Dragon in Dragon’s Dogma.
It is likely that the Drake in Devilfire Grove will be the first dragon encountered by the Arisen in the world of Gransys. After the cataclysmic events following The Final Battle, more dragons appear in Gransys, including other species.
Drakes are similar to their cousins the Wyrm and the Wyvern in that they bear some of the same abilities and characteristics. However, they are differentiated from their cousins by their relation to the Fire element. Accordingly, Drakes bear a natural weakness to Ice based attacks.
Defeating a Drake has a small chance of dragon forging the Arisen’s equipment, provided it has at least one level of enhancement.
Notes
- The Catacombs may be explored at any time, even before the quests Seeking Salvation and Rise of the Fallen.
- Falls down the lift shaft pit are always fatal (even when mitigating Fall Damage with Skull Splitter). However a fall from the upper to lower level onto the lowered lift plate is relatively safe but painful.
- The Catacombs teem with Undead — any form of Holy based weapon or magic is recommended. Fire is almost equally as effective.
- There is a hidden room on the First Floor of the Catacombs, which pawns will draw attention to — vocations with limited jumping skills can make use of a nearby indestructible crate to gain access to the room via a broken high wall section.
- A number of the Sarcophagi are booby trapped and may inflict Curse upon opening.
- The underground geography does not line up with the overground exits — the exit from the 3rd Level Underground (usually first found during Seeking Salvation) should be far to the west of the exit under the bridge near Gran Soren — almost under the Wilted Forest in fact.
The Dragon’s Dogma Official Design Works (p.291) says that it was used to bury the victims of a plague.
Walkthrough
This quest becomes available after completing both Trial and Tribulations and Griffin’s Bane. Obtain the quest by speaking with Aldous and selecting «Assist Ser Mercedes».
Speak with Mercedes and travel to the tower
Rebellion at the tower
After accepting the quest from Aldous, exit the castle and speak with Mercedes at the front gate to the Noble Quarter. Apparently, there is unrest among the soldiers at the Stone of the North (the Windbluff Tower).
After speaking with Mercedes, she will depart for the Windbluff Tower. Travel north to the Windbluff Tower, besieged by two groups of soldiers engaged in battle. Leave the soldiers to fight among themselves and head up the stairs to the main castle building.
In the upper courtyard, Mercedes confronts Julien and they duel.
Observe the Duel
The duel between Mercedes and Julien has two different outcomes. Each outcome grants different reward weapons and will impact the game differently, so choose which outcome is preferable:
- Julien wins.
- Idly observe the duel or walk out of the courtyard during the duel. Mercedes will lose the duel. Julien escapes and Mercedes will hand over her Silver Rapier. Julien will automatically win if the Arisen takes part in the fight and damages Mercedes or if Julien lands an attack on the Arisen.
- Julien is defeated.
- Interfere in the fight and slay Julien. The time the Arisen can intervene is limited to Mercedes being hit three times. After Julien is slain, attempting to walk away will play a cutscene and cut off the opportunity to aid Julien or give gifts to Mercedes. If Julien is revived it will be possible later to obtain the Wizard’s Vizard magic shield. Note: Reviving Julien before this particular cutscene plays is necessary or he will disappear; it is triggered only when the Arisen reaches a particular spot in front of the open doorway that serves as an exit. It is also possible to give Mercedes gifts until this particular cutscene plays if the player wishes to maximize her affinity towards the Arisen. After attempting to walk away, the cutscene plays and a disappointed Mercedes will hand over a Cutlass.
- The Arisen sides with Julien
- If the Arisen interfers with the duel, and attacks Mercedes she will be defeated. In this case she gives the Arisen a Cutlass before departing.
The last possible moment to interfere is right after Mercedes says «Rrgh…! Bastard!» while Julien is beating down on her shield with his Threaded Cudgel. Otherwise the cutscene in which Mercedes is bested starts.
Report Back to Aldous
Heading down the Windbluff Tower stairs, the battle between the soldiers has been decided. Speaking with Ser Daerio before leaving provides some interesting background information. Head back to Gran Soren, and report to Aldous.
Outcomes
Regardless of the duel’s outcome, Mercedes is crestfallen and plans to leave for Hearthstone to gather aid for Gransys.
If Julien is slain, and then revived with a Wakestone he will admit defeat and return to the Duke’s Demesne of his own volition, turning himself in for his crimes. He can then be later found in the castle dungeon. Speak with Julien in his cell and he will gift you his Magick Shield, the Wizard’s Vizard.
After the rebellion the fort is deserted, with all the rebellious guards and Ser Daerio slain. Ser Francis may be found outside the tower after the battle.
Stat Calculator
Many players plan their Arisen’s and/or their Pawn’s stat growth. The following stat calculators can help determine the stats at various levels.
-
Dragon’s Dogma Stat Planner
The stat calculator works in a broswer (uses standard HTML/Javascript to function). Should function offline (use «save as» for offline use) with minimal loss of functionality (use https://github.com/stackoverflow/dragons-dogma-stat-planner to report and bugs)
(online version)
Spreadsheets
-
Dragon’s Dogma Stat Calculator
In order to use it, please save a copy to the user’s Google Drive or download the XSLX (ODS does not function correctly) file to the user’s local system and then enter values as needed.
-
- Google account required to access.
- In order to use it please save a copy of the spreadsheet to your own Google Drive, download the spreadsheet as a .xlsx file (requires Microsoft Excel, may not function properly with all versions)( or send a Private Message to user Sosiego on GameFAQs to make a copy of the spreadsheet for your personal use.
- This a full build planner that allows users to not only calculate their Arisen and Main Pawn’s base stats but also see what their stats will look like with weapons, armor, clothing and stat boosting augments equipped.
- The list of stat boosting augments does not include situational augments such as Autonomy, Bloodlust or Opportunism. ATK/MATK values for having those augments equipped will need to be manually calculated.
- Known bugs: Equipment not being selectable due to the sheet thinking no vocation has been selected. Simply hitting ESC and then trying again fixes the issue.
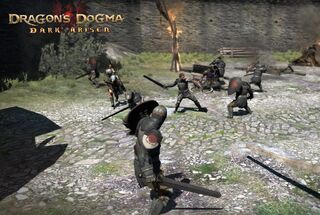
Tactics
Offensive
Fighter vs 4 Ogres. No damage.
Solo Fighter with Ascalon sword vs 4 Ogres near the Abbey at night. While attacking from the rear is safer, attacking the head inflicts more damage. Without a shield, Hindsight Strike is used to evade and counter the Ogre’s attacks.
- Can be Cursed. Also vulnerable to Lowered Strength.
- Immune to Blindness and Petrification.
- Ice attacks can occasionally freeze a part of their body.
- Vulnerable to Torpor and Poisoning.
- Vulnerable to Sleep.
- The head is its weak spot and takes extra damage.
- Specifically hitting «between the eyes», and from the front gives double damage, compare to head strikes off to the sides
- The Ogre can take a defensive posture blocking attacks to its head — staggering or stunning the Ogre may break this defense.
- A temporarily recumbent Ogre, such as after its ‘drop kick’ is vulnerable and takes extra damage.
- Attacks on a sleeping or eating Ogre will cause extra damage.
- Unlike a Cyclops, it is difficult to stun an Ogre with Lightning. Furthermore, it is almost impossible to stun an enraged Ogre, and they are also less prone to staggering when enraged.
- After successfully avoiding a charge attack and grabbing the Ogre before it regains its balance will result in the Ogre being downed.
- Perfect Blocking an Ogre’s dropkick will knock it down. Failed perfect blocks (due to lack of shield stability) will not have the same effect.
- Fighters can use the Shield Storm skill to reliably break an Ogre’s guard and cause it to reel potentially setting the Ogre up to be downed, this also works on Elder Ogres. Warrior’s Pommel Bash and Strider’s Mighty Bend will break the Ogre’s guard in the same way.

Solo Mystic Knight slays 2 Ogres with a Perfect Block. No damage.
A Mystic Knight demonstrating a fast kill technique, using the Blessed Ripote/Great Cannon combo.

Two Ogres slain near The Abbey in the Wilted Forest.
A Strider demonstrating climbing technique. Attack an Ogre’s head in order to slay them quickly.
Defensive
- Fighters: Caution — Ogres can grab characters even in the middle of executing Dragon’s Maw or Hindsight Strike, when the Arisen usually expects to be briefly invincible.
- If climbing the monster and it reaches up to grab, Instant Reset and jumping can be used as an emergency dismount to avoid being grabbed and eaten.
- Should a party member be grabbed, staggering attacks to the brute’s arms are most effective at making it let go.
- When climbed on
Take advantage of this predictable behavior to bait the Ogre into jumping onto its back, as they take more damage when they are on the ground.
from behind, an Ogre will counter by jumping up and landing on its back.
- Fighting two or more Ogres at once can be surprisingly beneficial to the Arisen, as the Ogres will occasionally hit each other, inflicting substantial damage. Their drop kick in particular can really do some damage to fellow Ogres.
- When enraged, the Ogre will flush red and charge at the Arisen. This can be used to the Arisen’s advantage if there are sheer cliffs or water nearby, as the Ogre can be lured over the edge for an easy kill (this will usually relinquish any reward drops). Be careful not to get dragged along with it over the edge.
Arisen may want to kill smaller enemies in the area first before attacking the Ogre.
Eating
An eating Ogre will not notice the Arisen
Ogres will grab and attempt to eat the Arisen and allies. When males are grabbed the Ogre will reject the prey with disgust after a few bites, usually leaving it staggered.
Additionally, Ogres will eat dead foes. Even if they have already spotted the Arisen and become aggressive, they may stop to eat dead in their path and forget about battle. Leaving a corpse in the ogre’s path and hiding will usually distract them even if they have already seen the party, but provided they have not become fully aggressive. Even when in obvious view an Ogre will continue eating. Attacking, approaching its personal space, or stealing their meal causes them to become aggressive once more.
Pawns usually spoil all attempts to pacify Ogres with bait by attacking.
Loot
There are numerous chests, and sarcophagi in the tombs. Plants are unknown here, and mushrooms are uncommon. Skulls, curatives, and lesser items such as Empty Flasks are common. All kinds of environmental objects such as Pots, Explosive Barrels, boxes and Large Stones are all abundant.
Catacomb Gold is unique to the area’s deep level ore deposits.
| Upper Levels Map | |
|---|---|
| Chest | Contents |
| 1 |
Mage’s Periapt, Throwblast, Interventive, Purifying Brew, Large Coin Pouch.
Nearby sarcophagus may contain: Jewel of Silence, Salubrious Brew, Dragon’s Spit, Purifying Brew, Monk’s Periapt or Large Coin Pouch |
| 2 |
Ferric Talon, Iron Helm. A Liquid Vim is nearby
The standing sarcophagus in a hall south from here may contain: Coin Purse of Charity, Dragon’s Spit, Monk’s Periapt, Light-Cure, Tuft of Hair, Large Coin Pouch. The one by the lever may contain Jewel of Silence, Purifying Brew, Monk’s Periapt, Dragon’s Spit, Large Coin Pouch. |
| 3 |
Iron Armguard, Iron Manicae, Large Coin Pouch
The Sarcophagus just west of this chest may contain: Direwolf Cape, Salubrious Brew, Monk’s Periapt, Purifying Brew, Dragon’s Spit, Conqueror’s Periapt, Shackle, Large Coin Pouch. |
| 4 | Veteran’s Periapt, Skeleton Strategies, Balmy Perfume, Interventive, Coin Pouch |
| 5 | Violet Ring, Ogre Bone, Jewel of Darkness, Angel’s Periapt, Liquid Vim, Large Coin Pouch |
| 6 |
Second Journal Entry
A nearby Book Pile may yield : Undead Strategy Vol. 1, Ancient Scroll, Coin Pouch |
| 7 |
Angel’s Periapt, Ghost Tactics Vol. 2, Liquid Vim, Salomet’s Secret, Large Coin Pouch
The northern of the two nearby upright Sarcophagi may contain : Scale Greaves |
| 8 | Eden’s Warden, Scalding Razors, Feather-Light Pelta, Coin Purse of Charity, Jewel of Health South from the chest, a sarcophagus, with a crate by it, may contain : Scale Greaves |
| 9 | Set of Salvation Robes |
| 10 | Dalmatica, Missionary’s Robe, Silverwheat Paste, Balmy Perfume |
| 11 | Bronze Sallet, Wizard’s Helm, Headless Icon, Undead Strategy Vol. 2, Large Coin Pouch |
| 12 | Magick Buckler, Frame Plate, Ring of Gules, Violet Ring |
| 13 | Leather Circlet, Tiger Bangle, Coin Purse of Charity, Angel’s Periapt, Liquid Vim, Large Coin Pouch |
| 14 | Mage’s Shoes, Iron Cuisses, Wight Tactics, Throat Drops, Large Coin Pouch |
| 15 |
Bliaut, Full Chain Hosen, Rose Ring, Angel’s Periapt, Conqueror’s Periapt, Large Coin PouchA nearby chest contains a Pilgrim’s Charm during A Parting Gift
In a small room due south (en-route to the Collapsed Meeting Room exit), a sarcophagus may contain : Direwolf Cape |
| 16 | Restless Earring, Direwolf Cape, Violet Neck Wrap |
| Weapon Piles | |
|
minor items not listed, not marked on map First Floor : before the lever-activated door, in the room with the second lamp :
First Floor : after the lever-activated door :
Second Level Underground : in the room with the third lamp and Skeleton Knights :
Second Level Underground : in the two-pillared chamber where the Ogre resides :
|
| Lower Levels Map | Chest | Contents |
|---|---|---|
| 17 | Crescending Roar, Frozen Tomorrow, Scorched Pelta, Coin Purse of Charity, Monk’s Periapt, Salomet’s Secret, Light-Cure | |
| 18 | Crimson Teeth |
Trivia
How to slay the Dragon with a single arrow (Maker’s Finger Speed Run technique)
- Grigori is the name given to the angels referred to as «the watchers» in the Books of Enoch in Biblical mythology (see Wikipedia:Grigori (angel)). The Dragon’s winged appearance, his resistance to Holy magick, and the image displayed in the loading screen (revealed in full during the credits) complement this angelic motif within the mythology of Dragon’s Dogma.
- In western medieval European literature and folklore (see Wikipedia:European dragon) the image of Dragons developed into a huge snake or lizard like monster that often took the role as kidnapping or requiring the sacrifices of ‘princesses’ (specifically the story of Saint George and the Dragon and derivative works) — this theme is referenced somewhat in rescuing the Arisen’s beloved from the Dragon.
- Also in European myth and folkore a Dragon’s blood has special powers — for example a person bathing the blood is rendered invulnerable or immune from harm, disease, or age etc. (eg the hero Sigurd and the dragon Fafnir) This theme is not visited directly — though the Arisen becoming un-aging, and the process of Dragonforging seem to show some influences.
- Other literary tropes such as a Dragon living underground, being gluttonous, or hording treasure are not visited.
- During the pre-game start-up screen Grigori (or a very similar Dragon) can be seen roosting on The Ruins of Aernst Castle.
- It has been claimed that Grigori’s speech, and other instances of Wyrmspeak is spoken in Latin in game. However no matching translation or transliteration of these lines has yet been provided, and an alternative claim that the lines are «gibberish» has also been made.
Quotes
Ser Tedrick:
- «There’s talk of revolt in the north. Won’t say I cannot understand the impulse…manning a desolate stronghold that serves no purpose in staying the Dragon is mean work. There’s only so much fear and idleness a man can take. Especially on those meager wages.»
Orsay, one of the castle residents, confirms that Mercedes may need more than moral support in this task if battle happens:
- «Lord Julien is well enough, but Ser Mercedes is more burden than boon, it’s told. She’s the daughter of the Lord of Hearthstone, you see…. and for a knight sent to aid the Duke, one hears precious little praise of her skill. If the woman falls before the dragon arrives, we’ll have another war on our hands.»
Ser Daerio reveals the full extent of his involvement in the revolt; he is Lord Julien’s man:
- «It is as you see, Arisen, the Stone of the North crawls with the agents of Salvation. The Night’s Champion is a fearsome intellect. He authored and executed the scenario in full. He scoured the Duke’s men for those with ties to Salvation, gathered them here and sparked a revolt before anyone was the wiser. Myself, I put no stock in Salvation’s creed. But the Champion claims that the Duke is lost in this war with the Dragon, and in that I feel he speaks true. I will not gainsay your mettle, ser, but even the Arisen is human. The wyrm cannot be slain. Pray, forgive me. As a commander I am duty bound to observe the conditions and exercise my best judgment. I take no joy in crossing you, ser.»
Ser Francis on Julien’s treason, if the latter was wakestoned.
Overview
Stat Growths are influenced by Vocation.
Upon leveling up, each of the six primary stats (Health, Stamina, Strength, Magick, Defense, and Magick Defense) will increase in an amount determined by current Vocation. Stat increases vary for each vocation in a way that mostly benefits their respective Vocation’s play style and continued use.
The highest stat growth is to level 100, with a slight change in the partitioning of growth at level 10; from level 101 to 200 growth is much reduced to around one third of that per level previously.
Starting Stats
At the beginning of the game, in the quest Newly Arisen a choice of one of three Basic Vocations (Fighter, Mage, or Strider) is given.
The initial health, attack powers, defense, and magicks are slightly different depending on the choice.
| Health | Attack | Defense | Magick Attack | Magick Defense | |
|---|---|---|---|---|---|
| Fighter | 450 | 80 | 80 | 60 | 60 |
| Strider | 430 | 70 | 70 | 70 | 70 |
| Mage | 410 | 60 | 60 | 80 | 80 |
Starting Stamina is independent of vocation but increases by a small amount by each increase in Character Weight class.
| Weight | Weight class | Initial Stamina |
|---|---|---|
| Under 50 | SS | 500 |
| 50 — 69 | S | 520 |
| 70 — 89 | M | 540 |
| 90 — 109 | L | 560 |
| Over 109 | LL | 580 |
Consolidated Leveling Charts
This section is a reference for all vocations, consolidated for easy reference and comparison.
| Levels 2-10 | Health | Stamina | Attack | Defense | Magick Attack | Magick Defense | Total | |
|---|---|---|---|---|---|---|---|---|
| HP+Sta | Attack+Defense | |||||||
| Fighter | 30 | 20 | 4 | 3 | 2 | 2 | 50 | 11 |
| Strider | 25 | 25 | 3 | 3 | 3 | 2 | 50 | 11 |
| Mage | 22 | 20 | 2 | 3 | 4 | 3 | 42 | 12 |
| Levels 11-100 | Health | Stamina | Attack | Defense | Magick Attack | Magick Defense | Total | |
|---|---|---|---|---|---|---|---|---|
| HP+Sta | Attack+Defense | |||||||
| Fighter | 37 | 15 | 4 | 4 | 2 | 1 | 52 | 11 |
| Strider | 25 | 25 | 3 | 3 | 3 | 2 | 50 | 11 |
| Mage | 21 | 10 | 2 | 1 | 4 | 4 | 31 | 11 |
| Warrior | 40 | 10 | 5 | 3 | 2 | 1 | 50 | 11 |
| Ranger | 21 | 30 | 4 | 2 | 3 | 2 | 51 | 11 |
| Sorcerer | 16 | 15 | 2 | 1 | 5 | 5 | 31 | 13 |
| Assassin | 22 | 27 | 6 | 2 | 2 | 1 | 49 | 11 |
| Magick Archer | 21 | 20 | 2 | 3 | 3 | 4 | 41 | 12 |
| Mystic Knight | 30 | 20 | 2 | 3 | 3 | 3 | 50 | 11 |
| Levels 101-200 | Health | Stamina | Attack | Defense | Magick Attack | Magick Defense | Total | |
|---|---|---|---|---|---|---|---|---|
| HP+Sta | Attack+Defense | |||||||
| Fighter | 15 | 5 | 1 | 3 | 20 | 4 | ||
| Strider | 5 | 15 | 1 | 1 | 1 | 1 | 20 | 4 |
| Mage | 10 | 10 | 2 | 2 | 20 | 4 | ||
| Warrior | 5 | 15 | 2 | 2 | 20 | 4 | ||
| Ranger | 5 | 15 | 2 | 1 | 1 | 20 | 4 | |
| Sorcerer | 10 | 10 | 3 | 1 | 20 | 4 | ||
| Assassin | 5 | 15 | 3 | 1 | 20 | 4 | ||
| Magick Archer | 10 | 10 | 0 (1) † | 1 | 3 (2) † | 20 | 4 | |
| Mystic Knight | 15 | 5 | 1 | 1 | 1 | 1 | 20 | 4 |
| † Parenthesis enclosed values are changes in Dark Arisen |