Act three
Содержание:
Portals and Red Rooms
These rectangular looking portals are the level skippers of the game. They are always found in the first level of every act and only spawn after you defeated the boss of that respective chapter at least once on that New Game Plus level.
Example: For the portal to appear in the Mines, you must kill the Stone Guardian. For it to appear in the Prison, you must defeat the Warden once.
What happens when I go in?
You reach a room with a red cube that has a large chunk of HP. Once you hit it enemies will start spawning, with a new wave appearing every 10 seconds until the cube it killed.
Additionally, every time the cube loses a chunk of health (Reticle colors when hovering over it change from red back to green) it will summon an extra wave of enemies.
This means if you are able to quickly kill the pillar in only a few seconds, about 10 waves of enemies will spawn one after another with less than half a second in between waves.
Once the cube is destroyed, every enemy in the room is killed instantly.
Beating a Red Room for the first time and picking up the sphere where the cube was will unlock for your entire guild.
Skills and Abilities
The tables below list base values and tiers as they’re shown in the guild hall.
As an example, the first upgrade for Branding Ward can be bought at a Tier 2 guild hall.
Every upgrade to a skill costs skill points, which are denoted as stars in the upper-right corner of the screen while in town.
| Witch Hunter skills | ||||||
|---|---|---|---|---|---|---|
| Repeater Crossbow | Flaming Hounds | Branding Ward | Witch Pyre | Fanatic Zeal | A Murder of Crows | Searing Torch |
 |
Repeater Crossbow (Primary Attack)
Fires 4 bolts in quick succession. Each bolt deals that ignores armor.
Bolts pierce enemies but lose 50% damage with each enemy pierced.
Every upgrade increases the base damage and the amount of armor ignored.
Witch Hunter primary attack speed is 0.9 seconds.
| Upgrades | Base | Tier 1 | Tier 2 | Tier 3 | Tier 4 | Tier 5 |
|---|---|---|---|---|---|---|
| Damage | 5 | 8 | 11 | 14 | 17 | 20 |
| Armor Ignored | 5 | 10 | 15 | 20 | 25 | 30 |
| Star Cost | N/A | 3 | 4 | 5 | 6 | 8 |
Flaming Hounds (Skill 1)
The Witch Hunter unleashes a Flaming Hound that bounces five times in a forward direction.
The hound explodes when bouncing dealing , which is increased by 50% with each bounce.
| Upgrades | Base | Tier 1 | Tier 2 | Tier 3 | Tier 4 | Tier 5 |
|---|---|---|---|---|---|---|
| Damage | 10 | 15 | 20 | 25 | 30 | 35 |
| Mana Cost | 20 | 25 | 30 | 35 | 40 | 45 |
| Star Cost | N/A | 3 | 4 | 5 | 6 | 8 |
Branding Ward (Skill 2)
Places a ward on the ground that triggers when enemies get close.
Enemies hit by the ward take and are branded.
Branded enemies take 100% more damage.
| Upgrades | Base | Tier 1 | Tier 2 | Tier 3 | Tier 4 | Tier 5 |
|---|---|---|---|---|---|---|
| Damage | N/A | N/A | 40 | 60 | 80 | 100 |
| Duration | N/A | N/A | 3 | 4 | 5 | 6 |
| Max Wards | N/A | N/A | 4 | 6 | 8 | 10 |
| Mana Cost | N/A | N/A | 40 | 45 | 50 | 55 |
| Star Cost | N/A | N/A | 5 | 6 | 8 | 10 |
Witch Pyre (Skill 3)
Places a pyre on the ground that last for 7.5 seconds.
Enemies that hit the pyre ignite an explosion dealing .
Enemies close to the pyre also start burning.
The pyres have their own Health, Armor, and Resistance that scales with the level of the skill and character skill power.
| Upgrades | Base | Tier 1 | Tier 2 | Tier 3 | Tier 4 | Tier 5 |
|---|---|---|---|---|---|---|
| Health | N/A | N/A | N/A | 300 | 500 | 700 |
| Armor | N/A | N/A | N/A | 10 | 20 | 30 |
| Resistance | N/A | N/A | N/A | 10 | 20 | 30 |
| Damage | N/A | N/A | N/A | 40 | 80 | 120 |
| Mana Cost | N/A | N/A | N/A | 65 | 90 | 115 |
| Star Cost | N/A | N/A | N/A | 7 | 9 | 12 |
Fanatic Zeal (Passive 1)
Generates stacks of Fanatic Zeal when casting a skill.
Each stack increases critical hit chance for all attacks and skills by 2.5%.
Fanatic Zeal stack number and duration scale with the level of the skill.
| Upgrades | Base | Tier 1 | Tier 2 | Tier 3 | Tier 4 | Tier 5 |
|---|---|---|---|---|---|---|
| Stacks | N/A | 4 | 5 | 6 | 7 | 8 |
| Duration | N/A | 4 | 5 | 6 | 7 | 8 |
| Star Cost | N/A | 2 | 3 | 4 | 5 | 6 |
A Murder of Crows (Passive 2)
Unleashes Crows when taking damage that defend the Witch Hunter.
Cooldown reduced per level.
| Upgrades | Base | Tier 1 | Tier 2 | Tier 3 | Tier 4 | Tier 5 |
|---|---|---|---|---|---|---|
| Crows | N/A | N/A | 5 | 7 | 9 | 11 |
| Cooldown | N/A | N/A | 10 | 9 | 8 | 7 |
| Star Cost | N/A | N/A | 4 | 5 | 6 | 8 |
Searing Torch (Passive 3)
Throws a torch towards a random nearby enemy when casting a skill.
The torch explodes on impact dealing and apply burning.
| Upgrades | Base | Tier 1 | Tier 2 | Tier 3 | Tier 4 | Tier 5 |
|---|---|---|---|---|---|---|
| Damage | N/A | N/A | N/A | N/A | 60 | 120 |
| Star Cost | N/A | N/A | N/A | N/A | 10 | 15 |
Prestige
Prestige is earned by Mercenaries as they adventure, beat bosses, and complete campaigns. While the mercenary is alive, Prestige is the value that decides their current Class Level according to the table below. On death it is transferred over to the Legacy Points total of the town. These Legacy Points can be spent at the Legacy shop for special cosmetics usable by all heroes.
Prestige is worked out according to the formula:
=INT(Floors Visited)+INT(Bosses Killed*10)+INT(POW(Tower NGP,2)*75)+INT(POW(Pyramid of Propecy NGP,2)*175)+INT(POW(Moon Temple NGP,2)*200)+INT(POW(Arena Level/4,2)*25)
Your Prestige Rank determines which Town facilities you can use, along with giving your Mercenary a bonus to Gold and XP gain.
| Rank | Prestige | Bonus to Gold and XP |
| Private | +15% | |
| Corporal | 50 | +30% |
| Sergeant | 200 | +45% |
| Lieutenant | 500 | +60% |
| Captain | 1000 | +75% |
| Major | 2500 | +90% |
| Colonel | 5000 | +105% |
| General | 10000 | +120% |
Debug commands
| Debug commands (* denotes e_cheats is required) | |
|---|---|
| cs_show_menu* | Displays a menu at the top of the screen with many debug options and useful information about the current save |
| ui_flags 0 | Displays any currently set flags on screen, «ui_flags 2» can be used to display on the right |
| list_flags | Lists the current flags in the console |
| listenemies | Lists the current enemies in the console |
| listmodifiers | Lists the current modifiers in the console |
| r_draw_scripts* | Displays scripts on screen. |
| r_draw_scripts_compact* | When scripts are being drawn, this will toggle whether they are compact or not. |
| r_draw_scripts_lines* | When scripts are being drawn, this will toggle whether connecting lines are drawn. |
| r_draw_collision* | Draws object collision. |
| r_draw_physics* | Draws object physics. |
| r_draw_raycasts* | Shows raycasts. |
| r_draw_pathfinds* | Shows pathfind information |
| debug_widgets | useful for debugging on screen widgets. |
| ui_cursor_unit | Displays unit name when the mouse is over it. |
| debug_dungeon_prefabs | listed currently loaded dungeon prefabs in the console |
| dump_unit_list* | list current level units in a file in the game repository |
| dump_level_save* | dump the level in a file in the game repository |
Statue Blueprints
From left to right: Bolgarth, Calis, Cedric, Ewran, Kyra, Ozreth, Phalarath, Wylmir
Statues and their blueprints are new with the DLC and give the player extra bonuses during their attempts at killing or Nerys. They cost increasing amounts of to upgrade and act as an infinite ore sink so long as the player can continue to get higher and higher level blueprints to upgrade their statues. The blueprints (orange in color) appear on any act and floor in the Pyramid of Prophecy campaign, however unlike blueprints for the Magic Anvil statue blueprints don’t appear for every player, nor are the blueprints the same statue or tier. They are entirely individual, so keep a look out on the map for your own blueprints when playing in multiplayer as no one can help you look for them.
The blueprints do indicate what statue they upgrade, but because of the small image, it can be difficult to tell at a glance.
Statue blueprints can generally be found up to 3 tiers above the current New Game level the player is on. While not impossible to get higher tiers, it shouldn’t be relied on. This encourages the player to continue delving into the pyramid at higher difficulties.
Blood Altar
The blood altar is a small round table found randomly in the tower when playing with the Witch Hunter DLC, limited to one per run (however 1 per run is not guaranteed).
Using the altar will ask the player if they wish to sacrifice 10% of their current HP for a random buff that scales up with ng level being played.
This buff will persist across multiple runs, lasting until the player dies. Once the player dies, the buff is lost and the sacrificed HP will return.
Using the Altar multiple times will reduce max health by 10% multiplicatively.
| Buff Name | Effect | Scaling |
|---|---|---|
| Beast | Attack Power +30 | +3 |
| Chosen | Spell Power +30 | +3 |
| Immortal | Armor +25 | +2 |
| Fey | Resist +25 | +2 |
| Order | HP Regen +2 | +0.2 |
| Crone | Mana Regen +3 | +0.3 |
Building upgrades[]
Buildings in The Outlook can be upgraded at the Town Hall using ore found in the Forsaken Spire. It takes 1505 ore to fully upgrade all buildings.
| Town Hall Tier | Name | Ore Cost | Description |
|---|---|---|---|
| I | Town Hall I | — | Unlocks Tier 1 Buildings. |
| I | Treasury I | — | 50% tax rate at 10000 total gold. |
| I | Guild Hall I | — | Upgrade your skills to Tier 1. |
| I | General Store I | — | Buy Keys and Items (3 common). |
| I | Blacksmith I | 5 | Buy upgrades to your Weapons and Armor. |
| I | Ore Trader I | 5 | Buy and sell ore. |
| I | Apothecary I | 5 | Buy upgrades to your potion. |
| II | Town Hall II | 5 | Unlocks Tier 2 Buildings. |
| II | Treasury II | 20 | 50% tax rate at 15000 total gold. |
| II | Guild Hall II | 10 | Upgrade your skills to Tier 2. |
| II | General Store II | 10 | Buy Keys and Items (2 common, 1 uncommon). Prices are 5% cheaper. |
| II | Blacksmith II | 10 | Buy upgrades to your Weapons and Armor. |
| II | Ore Trader II | 10 | Buy and sell ore. Better trade rates. |
| II | Apothecary II | 15 | Buy upgrades to your potion and pickup effectiveness. |
| II | Fountain I | 10 | Throw gold in the fountain to have something happen (good or bad, amazing or terrible). |
| II | Chapel I | 15 | Unlocks Priest. Donate money to receive a permanent blessing. |
| II | Tavern I | 10 | Unlocks Thief. Gambling. |
| III | Town Hall III | 20 | Unlocks Tier 3 Buildings. |
| III | Treasury III | 40 | 50% tax rate at 20000 total gold. |
| III | Guild Hall III | 30 | Upgrade your skills to Tier 3. |
| III | General Store III | 25 | Buy Keys and Items (3 common, 1 uncommon). Prices are 10% cheaper. |
| III | Blacksmith III | 25 | Buy upgrades to your Weapons and Armor. |
| III | Ore Trader III | 30 | Buy and sell ore. Better trade rates. |
| III | Apothecary III | 35 | Buy upgrades to your potion and pickup effectiveness. |
| III | Chapel II | 35 | Donate money to receive a permanent blessing. |
| III | Tavern II | 20 | Buy up to 4 drinks. Increased stockpile limit for drinks. |
| III | Magic Shop I | 30 | Unlocks Wizard. Buy upgrades to your Skills and Resistance. |
| IV | Town Hall IV | 40 | Unlocks Tier 4 Buildings. |
| IV | Treasury IV | 80 | 50% tax rate at 25000 total gold. |
| IV | Guild Hall IV | 60 | Upgrade your skills to Tier 4. |
| IV | General Store IV | 50 | Buy Keys and Items (2 common, 1 uncommon, 1 rare). Prices are 15% cheaper. |
| IV | Blacksmith IV | 50 | Buy upgrades to your Weapons and Armor. |
| IV | Fountain II | 25 | Higher chance of something good happening. |
| IV | Tavern III | 40 | Buy up to 5 drinks. Increased stockpile limit for drinks. |
| IV | Magic Shop II | 60 | Buy upgrades to your Skills and Resistance. |
| V | Town Hall V | 80 | Unlocks Tier 5 Buildings. |
| V | Guild Hall V | 120 | Upgrade your skills to Tier 5. |
| V | General Store V | 125 | Buy Keys and Items (2 common, 2 uncommon, 1 rare). Prices are 20% cheaper. |
| V | Blacksmith V | 100 | Buy upgrades to your Weapons and Armor. |
| V | Chapel III | 135 | Donate money to receive a permanent blessing. |
| V | Magic Shop III | 120 | Buy upgrades to your Skills and Resistance. |
Multiplayer/Lobby commands
| Multiplayer/Lobby commands | |
|---|---|
| lobby_members | Write a list of all lobby members to the console. |
| lobby_kick | Kick a player from the lobby. Only works if you’re the host. Takes 1 parameter, the lobby member ID. Get the ID using *lobby_members*. |
| lobby_say | Send a chat message via the console. |
| g_multiplayer_limit | Set this value to some higher value than 4 before opening the «create lobby» menu to allow hosting lobbies with more than 4 players. |
| g_multiplayer_ping_limit | When clients get disconnected, they have this many seconds for their connection to be restored before they are automatically kicked. |
| g_pure | Must be set in the config file, default value is 1, by setting to 0 allows multiplayer with unpacked mods, you’ll only see players with the same pure settings as your own. |
Statues and Effects
(The Statues are content that is part of the Pyramids of Prophecy DLC)
| Name | Image | Effect |
|---|---|---|
| Kyra |  |
Build effect: 20% faster Primary Attack with a 50% chance to fire 2 arrows dealing 10 Physical damage
Upgrade effect: Base damage of the arrows is increased by 4. «She who named her bow The One String Harp, ’cause when it was plucked, her enemies would sing in agony.» |
| Phalarath |  |
Build effect: Lowers the health of an attacker by 5% when evading.
Upgrade effect: Each level of the statue increases damage done to disarmed and stunned enemies by +5% «Snuck in behind enemy lines and gutted pirate Captain Marius, this would eventually stop the siege of Castle Hammerwatch.» |
| Cedric | 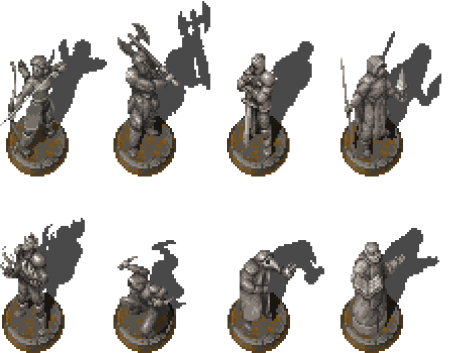 |
Build effect: Picking up mana crystals increases your Mana Regen and Resistance by 20% for 30 seconds.
Upgrade effect: Each level of the statue adds +5% of your Resistance to Skill Power. «Also known as «The Delayer of Death», at the peak of his career, the cemetery stood empty for many years.» |
| Calis |  |
Build effect: 20% chance to block most projectiles.
Upgrade effect: Each level of the statue adds +5% of your Armor to Attack Power. «Raised from childhood to fight the undead and protect the living. Devoted his life to serve the people.» |
| Ewran | Build effect: 7.5% to freeze enemies on Primary Attack.
Upgrade effect: Each level of the statue increases damage done to frozen enemies by +5%. «During a warm summer night, she froze Williamsons Pure Lake so the King could move his troops safely across.» |
|
| Wylmir |  |
Build effect: 20% faster Skills.
Upgrade effect: Each level of the statue adds 5% of the skill cost as damage to your Skills. «Used his last breath to blaze the caves and clean out the trolls between Blackbarrow and Fallowfields.» |
| Ozreth | Build effect: 20% chance of enemies leaving a poison cloud when killed that lasts for 4 seconds.
Upgrade effect: Each level of the statue increases damage done to poisoned enemies by +10%. «An outcast, master in death and decay who paid his debt to society by curing Queen Olivia at the darkest hour.» |
|
| Bolgarth | Build effect: Every 5th Primary Attack in Combo triggers a Combo Blast that deals 100 Magical damage.
Upgrade effect: Each level of the statue increases time to maintain Combo by 0.5 seconds. «Bolgarth’s axe was known as the «Crimson Crescents», because it was always red by the blood of his enemies.» |
|
| Daran | Build effect: Damage dealt to enemies that are burning has a 10% chance to also inflict bleeding.
Upgrade effect: Each level of the statue increases damage done to burning enemies by 5%. «Daran, a red priest, drew evil out of heathens with holy fire and bloodsucking maggots.» |
Secret Areas[]
- Floor 1
- Very early during the level, immediately north of the first copper door, is a large button that opens the first secret area.
- Inside the above secret area, directly north from the entrance corridor, is a cracked wall. Break it down to reveal a secret area with money and a rejuvenation potion.
- Further down the passage in this secret area, in the room at the very end there is a cracked wall in the upper right of the room. This leads to a one way portal to the 3rd floor.
- Head south from the first save point and cross the bridge. Further south, just before another bridge, go left. There’s a cracked wall next to the chains hanging from the wall. Break it down to find another secret area with money, an apple and a vendor coin.
- East of the second save point, nearly at the east edge, there are two red eyes hiding behind a wall. Following a narrow corridor, one can find a strange plank.
- Floor 2
- Near the spike and buttons puzzle, in the top room filled with bats, there are glowing red eyes marking a secret passage.
- In the top right corner of the floor near the arrow trap, there is small room with a cracked wall.
- After the bridge with the maggots and maggot spawners, the room to the right of the gated room with the plank has a breakable wall. This reveals a room with a button which will cause a chest to appear in the gated room. in the corner to the left of the gate, another breakable wall exists which reveals another button: this one opens up the gated room (from the side opposite of the gate).
- To the west of the area with the L2 Combo merchant (behind a golden door), the dead end to the left of the Golden Ankh (in a blocked room) contains a cracked wall. There is a sequence of stones you must press in order — so far that sequence is: Bottom-Right, Top-Left, Top-Right, Bottom-Left.
- Floor 3
- In the passageway directly behind your starting point on Floor 3, there is a switch along the back wall that reveals a secret Boost shop.
- To the left of the switch mentioned in the first bullet-point, the upper left corner of the back wall is cracked. This leads to a switch that opens a path to the Token near the row of arrow traps.
- A dead-end to the south-east of 4 MP Crystals (along the right side of a wall) contains a cracked wall leading to a L2 Combo shop.
- After deactivation the spikes via the arrow-trap hallway, the L2 Vitality shop can be accessed via a cracked wall to the right of the arrow-trap.
- East of the red boss door, there is a switch which will open a passage back to the vertical hall that shoots arrows. If you have activated the switch in the lower left corner of the area with Bat Spawners, then across that hall and slightly north, there is a switch in a newly opened secret passage. After pressing that switch, return to the red boss door and head south. This new passage has a plank, and a breakable wall to the First Easter egg (See screenshot below).
- Boss Room
Differences from normal Characters
Mercenaries start at level 20 with 25,000 gold. This gold is separate from your town’s gold. Each Mercenary has their own personal NG progression. They also start with a Mercenary-specific Companion.
Mercenary characters have the same base stats and scaling as non-mercenary characters, however they only have access to the primary attack of that class and this can’t be changed.
They can use the resources of your town, but with some limitations. Some aspects are limited by Mercenaries rank, with more being made available as you rank up, and other aspects are not available to mercenaries (such as statues).
Mercenaries can only play Multiplayer with other Mercenaries.
Imps
Imps will show up in the dungeon at random times. After they have appeared they will stay for 1 minute before leaving. If you are able to get to them before they leave they will reward you with one of the following options.
- Send your gold to town tax free. Only happens for Non-Mercenaries.
- Give you some gold. The amount received increases in later acts.
- Give you some ore. The amount received increases in later acts.
- Give you some experience. The amount received increases in later acts. Only happens when you’re not at max level.
- Give you some keys. You will always receive one bronze, silver, and gold key with a chance of also receiving an ace key.
- Give you a random item of any rarity.
- Remove all of your curses. Only happens when you have any curses.
There is approximately a 15% chance for an imp to spawn on any given floor, increased to 30% with the Plentiful Gifts Fountain fortune.
It is possible to have 0 imps spawn through an entire run, even with the fountain effect enabled, though if no floors are skipped the chance of the imp not spawning at all under these conditions would be: 0.7^16 = 0.3%.
The formula for how much gold the imp gives the player is:
Gold = ((2^Act * 1250) + (NG*5000)) * (Gold_Gain + (0.2 * NG))
The formula for how much ore the imp gives the player is:
amount = (int(pow(1.55f, act) * 3 + 0.5f) + int(g_ngp * 2.0f + 0.5f)
Stats
The player starts off at level 1. Every time the Paladin levels up, stat boosts are gained.
The most notable increases are to Health and Armor, which makes him a tank-based class.
To get stats at a given level, use the equation «X = scaling * (level-1) + level1stat»
| Attribute values by level | ||||||
|---|---|---|---|---|---|---|
| Attribute | Health | Mana | Health Regen | Mana Regen | Armor | Resistance |
| Level 1 | 75 | 50 | 0.4 | 10 | ||
| Scaling per Level | +8 | +6 | +0.025 | +0.05 | +0.6 | +0.2 |
| Level 2 | 83 | 56 | 0.025 | 0.45 | 10.6 | 0.2 |
| Level 3 | 91 | 62 | 0.050 | 0.50 | 11.2 | 0.4 |
| Level 4 | 99 | 68 | 0.075 | 0.55 | 11.8 | 0.6 |
| Level 5 | 107 | 74 | 0.100 | 0.60 | 12.4 | 0.8 |
| Level 10 | 147 | 104 | 0.225 | 0.85 | 15.4 | 1.8 |
| Level 15 | 187 | 134 | 0.350 | 1.10 | 18.4 | 2.8 |
| Level 20 | 227 | 164 | 0.475 | 1.35 | 21.4 | 3.8 |
| Level 25 | 267 | 194 | 0.600 | 1.60 | 24.4 | 4.8 |
| Level 30 | 307 | 224 | 0.725 | 1.85 | 27.4 | 5.8 |
Game config commands
| Game config commands | |
|---|---|
| g_gore | Affects whether slain enemies will leave gore effects or not. True or False. |
| r_hdr | Enables or disables the use of HDR rendering. |
| g_language | Changes the game’s language. Currently no other languages. Will require a restart to take effect. |
| g_laser_sight | Changes the Aim Guide option. 1 for on, 0 of off, -1 for Auto. |
| g_local_player_marker | Adds a colored circle below your character’s sprite. True or False. |
| g_mousemove_speed | Multiplier for the speed of the mouse cursor movement on gamepads. |
| g_movedir_snap | Snap angle for the movement direction on gamepads. |
| g_potion_delay | Add a delay before you can reuse your potion. This can prevent rogue keyboards. |
| g_richpresence | Enable or disable rich presence for discord and steam. |
| r_shadows | Shadow quality. 0 = off, 1 = sun only, 2 = all. |
| r_smooth_scrolling | Enables or disables smooth camera scrolling. |
| rg_brightness | Brightness of the game. |
| rg_contrast | Contrast of the colors. |
| rg_gamma | Gamma value of the colors. |
| rg_crt_curve | Multiplier for the CRT curve effect. |
| rg_pixel_perfect | Whether the scene needs to render in pixel perfect mode or not. Pixel perfect in this sense means that the game will be rendered in 1x sprite scale and then upscaled (faster). If it’s disabled, the game is rendered in its full size and sprites are scaled instead (slower). Disabling pixel perfect allows for a few smoother effects like shadows. |
| g_time_hour | Set the in game time, useful if you’re not a fan of the night in town! |
Sarcophagi
The player will occasionally run into a sarcophagus that they can plunder. The sarcophagus acts like a «free» shop, containing 5 items no matter what and the player can pick and choose what they want from it. The game will pause in single player when interacting with a sarcophagus.
When the player picks the items they want (skipping the sarcophagus is allowed) they will be given Curse based on what items they took. the more items they pick the more curse they will get give, with Epic items being worth 51 curse, Rare 16 (2 rares are worth 51), Uncommon 4 (2 uncommmon are 11), and Common 1. The values of the curse given grow exponentially the more items the player takes, and care should be taken to manage how much curse the player contracts as it will cause problems for the player the more curse they have.
Character Titles
Each playable class grants a permanent global stat bonus to all of your characters when you unlock new Titles.
Each class grants their own unique stat and multiples of the same character title will not stack.
New Titles may be obtained by defeating bosses for the first time, and completing the game on higher difficulty settings.
The stat bonuses continue increasing infinitely as of version 87, but after NG+2 the name of the title will not change anymore.
| Unlock | Paladin | Ranger | Sorcerer | Warlock | Thief | Priest | Wizard | Gladiator | Witch Hunter |
|---|---|---|---|---|---|---|---|---|---|
| Stat Given | Armor | Attack Power | Mana Regen | Resist | Gold Bonus% | HP Regen | Skill Power | Primary Crit Damage | Skill Crit Damage |
| No Achievements | Novice (0) | Novice (0) | Novice (0) | Novice (0) | Novice (+0%) | Novice (0) | Novice (0) | Novice (+0%) | Novice (+0%) |
| Killing The Stone Guardian | Apprentice (2) | Apprentice (2) | Apprentice (0.2) | Apprentice (2) | Apprentice (+2.5%) | Apprentice (0.1) | Apprentice (2) | Apprentice (+5%) | Apprentice (+5%) |
| Killing The Warden | Journeyman (4) | Journeyman (4) | Disciple (0.4) | Disciple (4) | Journeyman (+5%) | Disciple (0.2) | Disciple (4) | Journeyman (+15%) | Disciple (+15%) |
| Killing The Three Wraiths | Squire (7) | Scout (7) | Arcanist (0.7) | Ritualist (7) | Bandit (+10%) | Zealot (0.4) | Scholar (7) | Scrapper (+25%) | Devotee (+25%) |
| Killing The Watcher | Champion (10) | Hunter (10) | Enchanter (1.0) | Occultist (10) | Rogue (+15%) | Patriarch (0.6) | Seer (10) | Pit Fighter (+40%) | Missionary (+40%) |
| Killing The Vampire Lord | Defender (15) | Pathfinder (15) | Elementalist (1.5) | Conjurer (15) | Brigand (+25%) | Bishop (1.0) | Sage (15) | Challenger (+60%) | Advocate (+60%) |
| Killing Thundersnow | Crusader (20) | Warden (20) | Channeler (2.0) | Diabolist (20) | Ruffian (+35%) | Archbishop (1.4) | Magus (20) | Defeater (+80%) | Adjudicator (+80%) |
| Completing NG+1 | Templar (25) | Sentinel (25) | Evoker (2.5) | Netherlord (25) | Infiltrator (+45%) | Cardinal (1.8) | Battlemage (25) | Hero (+100%) | Inquisitor (+100%) |
| Completing NG+2 | Lightbringer (30) | Guardian (30) | Spellbinder (3.0) | Deathlord (30) | Assassin (+55%) | Pope (2.2) | Archmage (30) | Idol (+120%) | Fanatic (+120%) |
Any further completions of higher difficulties will always grant the following increases to your title bonus:
Paladin: +5 Armor
Ranger: + 5 Attack Power
Sorcerer: + 0.5 Mana Regen
Warlock: + 5 Resistance
Thief: + 10% Gold Gain
Priest: + 0.4 Health Regen
Wizard: + 5 Skill Power
Gladiator: +20% Primary attack Crit damage
Witch Hunter: +20% Skill Crit damage
Console config commands
| Console config commands | |
|---|---|
| cs_bgcolor | Background color of the console. Set as a vec4: *cs_bgcolor 1 0 0 0.5* for a red transparent console background. |
| cs_fgcolor | Text color of the console. Set as a vec4. |
| cs_enabled | Enable or disable the use of the console entirely. Useful if you need the console toggle button for something else. |
| cs_height | The height of the console window, in a multiplier of the screen height: 0.5 means 50% of the screen height. |
| cs_show_build | Whether to show the game’s build ID in the bottom left of the screen. |
| cs_show_log | Shows recent log additions as an overlay at the top of the screen |
| cs_show_log_count | The amount of recent lines to be displayed for cs_show_log |
| cs_speed | The speed for the console toggle animation. The higher the faster. |
| condump | Dumps the contents of the console to a file, doesn’t include timestamps, format is condump «filename». |
Puzzles
Puzzles will be spread throughout your adventure. Solve them to claim prizes from gold to keys to chests containing powerful items!
There are several different types, some are self-explanatory, but a few don’t let blind guessing through.
The most common puzzles involve spike traps and projectiles. These are easily solvable given a little pattern recognition skill, then there are the other types which can become a mini-game in their own right.
Spoiler Alert! If you do not wish have these puzzles revealed and explained, stop here.
Lightning Run
Should you see a 3 x 3 pattern of squares on the floor with lightning bolts, congratulations, you have met the lightning run!
From the moment you step on the blank tile, the timer starts. Race to the next unlit tile as many times as you can before the timer finishes.
As you touch the unlit tiles, the 5 tiles on the left hand side of the 3 x 3 grid will start light up one by one. This indicates the level of prize you will receive.
The highest prize is tough to achieve as there is little margin for error.
Having high movement speed will be a great advantage here. A tip is that the next unlit tile must be 1 away from the previous unlit tile, and can be diagonally from the previous one.
From highest to lowest the rewards are:
- Silver locked chest
- Bronze locked chest
- Unlocked chest
- Bronze key
- Apple
The locked chests need keys, so if you don’t have any, try not to complete the puzzle to the highest level or you will miss out on your reward!
Lights Out
This little head-scratcher can be difficult for those who are inexperienced with the puzzle and often lead to reduced rewards.
Brute force will not get you through this puzzle with a good reward!
It consists of a 3 x 3 grid, with panels that are either lit up or dark. There is also a treasure spawn panel to the right.
Each time you step on a panel, it and all the adjacent panels will change state: if they were off, they are now on. If they were on, they are now off.
The objective is to have all the panels lit up.
You are allowed to make a few mistakes and still get the best reward, but only 3 or 4.
There is also a 5 x 5 version of this puzzle in the Archives that can appear extremely rarely.
From highest to lowest the 3 x 3 rewards are:
- Silver locked chest
- Bronze locked chest
- Unlocked chest
- Bronze key
- Food or gem pickup(?)
From highest to lowest the 5 x 5 rewards are:
- Ace Key (perfect)
- Gold locked chest
- Silver locked chest
- Bronze locked chest
- ?
- Apple
Symbol Memory
This puzzle has you test your memory. Once you press the button 5 different symbols will appear in the 3 x 3 grid randomly, but there will always be 3 Λ’s, 2 O’s, 2 X’s, 1 Y and 1 Z.
Each symbol type will light up in the order you should press them. You have unlimited(?) time to complete this puzzle, but you cannot reset it and try again.
If you feel like this puzzle is too troublesome taking a screenshot will allow you to easily solve it.
From highest to lowest the rewards are:
- Silver locked chest
- Silver Key
- Bronze locked chest
- Unlocked chest
- Bronze Key(?)
- Apple
Guess The Order
This puzzle tasks you with guessing the order to press the 4 buttons. Each wrong guess will drop a bunch of bombs in the room and explode shortly after.
You are allowed 3 wrong guesses while still being eligible for the best reward.
There are no hints for this «puzzle» on the floor or in the puzzle itself, being based purely on RNG. Guessing is your only option.
Even if you guess wrong every time, so long as you don’t repeat failed attempts you will beat the puzzle in 7 attempts (6 fails and 1 win).
From highest to lowest the rewards are:
- Silver locked chest
- Bronze locked chest
- Unlocked chest
- Bronze Key
Remember the Path
This is a 5 x 5 puzzle that appears in the where, once you press the button a path will be lit up tile by tile and it’s your job to remember and repeat it.
You are timed upon stepping onto a tile so doing the puzzle slowly will not fly. The path can loop back on itself and if you misstep once you lose.
From highest to lowest the rewards are:
- Golden locked chest
- Silver locked chest
- Bronze locked chest
- Wooden Chest
- Apple
Classes
Mercenaries use the same base stats as the classes, here is a table for easy comparison
| Attribute values by level | ||||||
|---|---|---|---|---|---|---|
| Attribute | Health | Mana | Health Regen | Mana Regen | Armor | Resistance |
| Paladin | 75 | 50 | 0.4 | 10 | ||
| Scaling per Level | +8 | +6 | +0.025 | +0.05 | +0.6 | +0.2 |
| Priest | 30 | 70 | 1.9 | 3 | ||
| Scaling per Level | +5 | +11 | +0.05 | +0.1 | +0.2 | +0.5 |
| Ranger | 50 | 50 | 0.5 | |||
| Scaling per Level | +6 | +6 | +0.025 | +0.075 | +0.5 | +0.2 |
| Sorcerer | 40 | 75 | 1.5 | 2.0 | ||
| Scaling per Level | +5 | +16 | +0.025 | +0.1 | +0.2 | +0.5 |
| Thief | 40 | 40 | 0.5 | |||
| Scaling per Level | +5 | +8 | +0.025 | +0.1 | +0.3 | +0.3 |
| Warlock | 60 | 75 | 1.5 | 2 | 2 | |
| Scaling per Level | +6 | +13 | +0.025 | +0.075 | +0.3 | +0.3 |
| Wizard | 35 | 75 | 1.5 | 2 | ||
| Scaling per Level | +4 | +15 | +0.025 | +0.1 | +0.2 | +0.5 |
| Gladiator | 65 | 50 | 0.5 | 2 | ||
| Scaling per Level | +7 | +7 | +0.025 | +0.05 | +0.3 | +0.3 |
| Witch Hunter | 45 | 60 | 0.75 | 1 | 3 | |
| Scaling per Level | +6 | +7 | +0.025 | +0.075 | +0.3 | +0.5 |