Durlag’s tower walkthrough
Содержание:
- Как спасти гнома на мельнице
- Rundown of a large Armor Class[]
- Suldanessellar[]
- Wild Forest[]
- The Underdark[]
- Finding Daxus[]
- Прохождение квеста — Извлечение паразита
- Altering the THAC0 of incoming attacks[]
- В создании персонажа[]
- Возможные игровые компаньоны, преимущества и недостатки, кого брать в команду
- The Golem Laboratory[]
- Sendai’s Enclave[]
- The Rune Room[]
- Baldur’s Gate 3 классы
- The Welcome Room[]
- А что с сопартийцами?
- The Navigator’s Room[]
- Balthazar[]
- Hidden Refuge[]
Как спасти гнома на мельнице
Двигаясь по деревне на запад, вы увидите мельницу и группу гоблинов. Начните бой и в какой-то момент противники попросят пощады. Отпустите их с миром. Далее вы услышите крики. К лопасти мельницы привязан гном. Чтобы его спасти вы должны попасть внутрь мельницы и нажать на тормозной рычаг. Далее развяжите пленника и пообщайтесь с ним.
Обыскивая деревню вы наткнетесь на трех огров, которые питаются трупами. Поговорите с самым умным из них, и убедите его работать на вас. При удачной проверке убеждения, они отдадут вам Боевой рог Дули. Вы можете его использовать в трудной ситуации, и огры придут на помощь. Помните, за услугу придется расплачиваться.
Справа от дома огров, находится в амбар из которого раздаются стоны. Не тревожьте любовников и проходите мимо на север. Двигайтесь к мосту, после чего, вы встретите искателей сокровищ. Возьмите у них дополнительное задание — Поиски Песни ночи, и проходите к главному входу в лагерь гоблинов.
Вас встретит часовой, который попросит не заходить во внутрь. При помощи навыка паразита, убедите гоблина впустить вас в лагерь и дополнительно разузнайте подробности местонахождения пропавшего друида.
Rundown of a large Armor Class[]
| Base AC | Gorgon Plate | -1 |
| General AC modifiers | Amulet of the Master Harper | -3 |
| Cloak of the Dark Moon | -2 | |
| Wondrous Gloves | -1 | |
| Helm of Balduran | -1 | |
| Ring of Gaxx | -2 | |
| Ring of Earth Control | -1 | |
| Axe of the Unyielding | -1 | |
| Scroll of Blur | -3 | |
| Greater Evasion | -6 | |
| Total Base + General | -21 | |
| Total Base + General once capped | -20 | |
| Uncapped general AC | DEX 24 with Potions | -6 |
| Single-Weapon style ++ | -2 | |
| Total AC displayed in the Inventory screen’s shield icon | -28 | |
| Slashing-specific AC modifiers | Gorgon Plate | -6 |
| Golden Girdle of Urnst | -3 | |
| Total Slashing-specific | -9 | |
| Total Slashing-specific once capped | -9 | |
| Uncapped damage-specific AC | Sword & Shield style ++ | |
| Final AC vs Slashing damage | -37 |
could be further improved against all Slashing attacks coming from Evil-aligned creatures that cannot see the invisible: Should the Fighter / Thief use Improved Invisibility from the Improved Cloak of Protection and double down with Protection From Evil, they would have the equivalent of an AC of -43.
In practical terms though, a defender’s AC only needs to be 20 points below their attacker’s THAC0 to ensure that only Critical hits will ever connect.
Suldanessellar[]
Once inside the elven city of Suldanessellar, Elhan will advise you to seek out Queen Ellesime or Priestess Demin. Watch out as there will be lots of tough monsters scattered around the city. Fight your way to the southwest corner and defeat Raamilat who is guarding Demin’s House. Enter Demin’s house and defeat the rakshasa. Demin will tell you that you need to find three relics and bring them to the Temple of Rillifane to enter The Palace.
Enter the House of the Talisman just east of Demin’s House. Inside you will find a locked container with several plates on it. The elven Priest Stone in the Priest’s House above will give you a clue for opening it. Select the plates in the following order: Rune of Corellon, Symbol of Rillifane, Symbol of Water, Tree of Life, and Suldanessellar. You will receive the Talisman of Rillifane.
Enter the House of the Moon to the north and you will witness an elven warrior sacrifice his life to protect the moonblade from a demon. Take the moonblade from the elven warrior’s body.
Go to the Forest Clearing in the northwest corner of Suldanessellar and confront Nizidramanii’yt the powerful black dragon. When you have finally defeated him, take the Golden Goblet of Life from its body.
Enter the Temple of Rillifane and defeat the enemies within. The enemies within consist of two iron golems, the mage Suneer who can cast Time Stop and Meteor Swarm (usually the latter during the former), a rakshasa, and a couple other things. Place the talisman, the moonblade and the goblet on the altar to summon the Avatar of Rillifane. He will awaken the guardian spirits of the forest and will break the seal on the palace gates. Get the Stone Horn from inside the House of the Horn and the Stone Harp from inside the Harpist’s House.
Enter the palace in the northeast part of Suldanessellar. Click on the tree in front of you a few times to gather its nuts. The larger nuts can be used for healing. Put the Stone Horn and the Stone Harp on the statues by the pool to reveal a staircase to the Tree of Life. An image of Ellesime will appear at the bottom of the staircase and will ask you to kill the parasites that are killing the tree of life.
Walk along the branches and find the three large parasites. In certain places, a new branch will be grown from one of the smaller Tree of Life nuts which will allow your party to cross. When you click on a parasite, two elementals will appear to defend it. Defeat the elementals and then click on the parasite again to kill it. When the last parasite has been killed, Irenicus will lose the power from the Tree of Life. Your party will appear before him and he will attack you. He is incredibly strong, a usual tactic for him being casting Absolute Immunity and a few other protective spells, then Time Stop, then Maze on one of your characters, maybe Power Word, Kill on one who is low on health, Abi-Dalzim’s Horrid Wilting, and possibly another Time Stop, all during the original Time Stop.
Wild Forest[]
This entire area is a wild surge zone, so keep spellcasting at minimum while trend towards physical methods.
Our goal here is to make it to the north-eastern corner of the map, start out by following the road to the north-east, you’ll find a gnome named Quaid (x=1620 y=2840), who turns out to be an illusion and will be launching Fireballs if you press him too much. The cart behind (x=1650 y=2750) contains some goodies to loot:
- Diamond
- 232
Also be ware of the trap (1650.2750).
Continue east, a few foes (Wolf, Giant Spider, Sword Spider) and a few traps to disarm (x=2060 y=2600), (x=2100 y=3000), (x=3400 y=3070), (x=4700 y=2090), (x=3270 y=1400).
Explore north along the western end of the map, keeping an eye out for traps (x=620 y=2600), (x=1800 y=2100) as you go. North of where Quaid’s cart is a Speaking Snake (x=2150 y=1780), again a verbal deterrent that is trying to fend off transpassers.
Continue north to find a group of Gnolls being chased by an «Ettin», unfortunately the creator wild mage shows incompetence again and the illusion vanishes, the Gnolls, annoyed by the trick, turn on you and get themselves killed. The Gnoll Captain will drop random goodies. Trap here, be careful (x=360 y=1360).
Head over to the bridge (x=4370, y=720), which seems inaccessible at first, just walk Neera over to it and she’ll expose the illusion to get through. Alternatively, find A Pile of Gravel in a ditch (x=4600 y=1100) south-east of the bridge, with it, reveal the true bridge state then cross. Exit this area and travel to the Hidden Refuge.
Beware of the Polymorph Trap (x=3345, y=3132)! Approaching it from below and Neera warns you about it, then two squirrels wander in and become ogres, then attack.
The Underdark[]
Go to the northwest corner of the Underdark and speak to the Svirfneblin leader Goldander Blackenrock. He will agree to help you enter the drow city if you destroy a beast for them.
Go northeast from him and enter the room with the big pit. Click on the pit and Balor will appear. He is an extremely difficult opponent and can only be hurt by +3 magical weapons. There are several drow in the area who have +3 longswords or +3 flails.
Once you have defeated Balor, use the Stoneshape Scroll to seal the pit. Return to Goldander Blackenrock and he will give you the Light Gem.
Enter Adalon’s lair on the east side of the area. She will ask you to retrieve her eggs which were stolen by Irenicus and Bodhi and in return she will help you leave the Underdark. She will transform your party into drow so that you can enter the city. Leave Adalon’s lair and approach the gates of the drow city of Ust Natha. The gates will open and you will be questioned. Say you are Veldrin from Ched Nasad and you will be allowed entrance into the city.
Finding Daxus[]
Now on to main quest line, talk to Hayes first if you wish, then Telana, go to the Bridge District in Athkatla, Hayes will be waiting south-west of Delosar’s Inn, go inside to find Daxus on the lower floor. If you have Talisman of the Hearthfire, tell him to teleport with it so that you only have to fend off one enemy wave plus a 5000xp later, it doesn’t matter if you talk to Hayes again afterwards but his dialogue may lead to some clue… otherwise decline Daxus’s offer to aid you in battle, you don’t want unexpected surge midbattle in presence of many NPCs, also deal with the reinforcement outside, then Hayes will take Daxus away (if he’s still around).
Back to Hidden Refuge, you’ll find it in a sorry state, many are gone, Telana is here, as are Mereth and Kirik, if you completed their quests. After talking to Telana, we’re off to the Red Wizard Enclave in Waukeen’s Promenade.
Прохождение квеста — Извлечение паразита
В прологе мы узнали, что у нас в голове находится паразит, и чем скорее мы избавимся от него, тем лучше. После катсцены в которой взрывается корабль наутилоидов, мы оказываемся на пляже. Начинаем двигаться по прямой вдоль берега и обыскивать трупы и ящики. Напомним, что поможет вам в этом клавиша ALT. На пристани обыщите рюкзак и подберите письмо. В конце концов вы увидите девушку, которая ломится в ворота.
Знакомимся с Шедоухарт. Это именно та девушка, который мы пытались помочь. Во время диалога у вас появится ментальная связь, которая ранее наблюдалась с Лаэзель. Просим девушку присоединиться к вам. Идём в обратную сторону, но по правой стороне. Стоит отметить, что рядом с воротами находится Древний рунический круг, при помощи которого вы сможете быстро перемещаться по локации.
Натыкаемся на обломки корабля и замечаем вдалеке Пожирателей интеллекта. В открытую конфронтацию вступать нежелательно, они значительно превосходят ваших героев по силе и здоровью. Следовательно, расстреливайте их издалека из лука, либо используйте магические свитки.
Разобравшись с противниками, обыщите трупы на всех ярусах и экипируйте новое оружие на своего героя. Идите прямо и обыщите ящики. Один из них будет закрыт на замок, используйте отмычки. Продолжайте двигаться по тропе, до тех пор пока не наткнетесь на эльфа просящего помощь
Неважно, согласитесь вы ему помочь или нет, помощь ему на самом деле не понадобится. Разговариваем с незнакомцем и узнаем, что его зовут Астарион и он тоже заражен паразитом
Берем его в команду.
Идем дальше и видим как в обломках корабля копошатся люди. Подходим к ним и смотрим катсцену. Выберите вариант ответа, который вам ближе. Если удастся убедить людей, то вы сможете пообщаться с манипулятором и пройти еще несколько проверок. Но если вы провалите, то порабощенные люди нападут на вас. Не пытайтесь с ними бороться, а попросту прикончите из лука наутилоида. Обыщите трупы и двигайтесь дальше.
Поднимаемся вверх по возвышенности и движемся направо. Когда увидите круг рун, то активируйте его. Из порта выйдет маг Гейл. Пообщайтесь с волшебником и пригласите его в свою команду.
Поднимайтесь еще выше и вы увидите как в ущелье два тифлинга держат в ловушке старую знакомую Лаэзель
Пройдите проверку на обман, тем самым убедив незнакомцев идти дальше и не обращать внимание на пленницу. Освобождаем гитьянку и берем ее к себе в команду
Поднимайтесь из ущелья вверх на север до ворот. Там вы увидите катсцену, где трое путников пытаются скрыться от отряда гоблинов за воротами города. Открыть их не удается, а гоблины уже тут как тут. Начинается бой.
Сражение довольно непростое, поэтому будьте готовы к хорошей взбучке. Изучите все способности своих сопартийцев, чтобы успешно использовать их в бою. Для начала разберите всех гоблинов лучников, а затем уже всех остальных.
Как только битва закончится, откроются ворота в Рощу друидов. Пройдите внутрь, где вы найдете спорящих Арадин и Зевлор. В зависимости от вашей расы и класса у вас может быть особый выбор, чтобы их успокоить. В конце концов, вам нужно будет атаковать одного из двух или пройти проверку, дабы смягчить ситуацию. После разговора с Зевлором начнется новый квест — Спасение беженцев.
Пока сосредоточимся на удалении паразита и будем двигаться на запад вверх по холму. Возле входа в дом познакомьтесь с Калдани. Она упомянет друида по имени Халсин, с которым и начнется новый квест.
Altering the THAC0 of incoming attacks[]
In three cases, a characteristic of the defender will affect the THAC0 of incoming attacks. The Inventory screen and the Record screen’s Combat Stats tab make no mention of them.
| Improved invisibility bonus | A defender that benefits from the type of Invisibility effect — as granted by e.g. Mass Invisibility or Mislead, but not Stealth or Potion of Invisibility — will inflict a +4 THAC0 penalty to all physical attacks against them. Attacks from creatures able to see the invisible are exempted from this penalty. |
|---|---|
| Protection from creature type bonus | A defender protected from certain types of opponents — thanks to e.g. Protection From Evil or Spirit Ward, but not Protection From Undead — will inflict a +2 THAC0 penalty to all physical attacks against them if they’re coming from the right type of attackers. |
| Unarmed or ranged penalty in melee | A defender not wielding a weapon (Monk excepted) or wielding a ranged weapon will grant a -4 THAC0 bonus to all melee attacks against them |
Minor note: All three modifiers will be included in the second value of the .
В создании персонажа[]
Dungeons & Dragons видит силу, телосложение, ловкость, интеллект, мудрость и харизму в качестве параметров персонажа или иногда как характеристики в других играх, хотя игры D&D были прародителями такой системы. Эти значения требуются некоторыми классами, компьютер справляется с этим, не позволяя опускать эти числа ниже требований, что кое как уравнивает суммарный бросок кубика.
В окне параметров при создании персонажа отдается предпочтение второстепенным классам, которые имеют большие требования к параметрам. Эти числа имеют фиксированное значение и могут быть только равны или выше этих значений, все остальные числа генерируются обычным образом, с более гибкой настройкой — это можно сравнить с магическим оружием; кинжал с +1 будет наносить 2-5 урона вместо 1-4; +1 — это предел, ниже которого параметры не могут опуститься.
В основном, можно сказать, что чем ниже требования, тем ниже будут значения бросков кубика, несмотря на то что это колеблется в пределах 10 и таким образом дает 85-95 очков в общей сложности. Обычно требуется время, чтобы получить суммарное количество очков параметров около или выше 90.
| Человек | Эльф | Полуэльф | Дворф | Полурослик | Гном | Полуорк | |
|---|---|---|---|---|---|---|---|
| Сила | 3/18 | 3/18 | 3/18 | 8/18 | 6/17 (-1) | 6/18 | 4/19 (+1) |
| Ловкость | 3/18 | 7/19 (+1) | 6/18 | 3/17 (-1) | 8/19 (+1) | 3/18 | 3/18 |
| 2/17EE (-1) | |||||||
| Телосложение | 3/18 | 6/17 (-1) | 6/18 | 12/19 (+1) | 10/18 | 8/18 | 4/19 (+1) |
| Интеллект | 3/18 | 8/18 | 4/18 | 3/18 | 6/18 | 7/19 (+1) | 3/16 (-2) |
| 1/16EE (-2) | |||||||
| Мудрость | 3/18 | 3/18 | 3/18 | 3/18 | 3/17 (-1) | 3/17 (-1) | 3/18 |
| 2/17EE (-1) | 2/17EE (-1) | ||||||
| Харизма | 3/18 | 8/18 | 3/18 | 3/16 (-2) | 3/18 | 3/18 | 3/18 |
| 1/16EE (-2) |
| Боец | Следопыт | Паладин | Священник | Друид | Маг | Вор | Бард | Колдун | Монах | Шаман | |
|---|---|---|---|---|---|---|---|---|---|---|---|
| Сила | 9 | 13 | 12 | ||||||||
| Ловкость | 13 | 9 | 12 | 9 | |||||||
| Телосложение | 14 | 9 | 9 | 12 | |||||||
| Интеллект | 9 | 13 | 9 | ||||||||
| Мудрость | 14 | 13 | 9 | 12 | 9 | 12 | |||||
| Харизма | 17 | 15 | 15 | 9 |
Подклассы классов имеют различные минимальные параметры, например, специализации магов, интересная группа с требованиями, добавляющими другой параметр к ожидаемому интеллекту:
| Отрицатель | Вызыватель | Прорицатель | Чародей | Иллюзионист | Воплотитель | Некромант | Преобразователь | |
|---|---|---|---|---|---|---|---|---|
| Сила | ||||||||
| Ловкость | 16 | 15 | ||||||
| Телосложение | 15 | 16 | ||||||
| Интеллект | 9 | 9 | 9 | 9 | 9 | 9 | 9 | 9 |
| Мудрость | 15 | 16 | 16 | |||||
| Харизма | 16 |
Возможные игровые компаньоны, преимущества и недостатки, кого брать в команду
По отзывам самих игроков наиболее лучшими игровыми компаньонами являются:
- Аэри — женщина маг и священник, свято чтит законы, чаще всего ее выбирают в качестве возлюбленной, однако не отличается особой силой;
- Валигар — молчун, но очень силен и ловок, имеет свое оружие, однако в разведательные вылазки не подходит из-за своего огромного телосложения;
- Йошимо — самый смышленый воришка, может выйти из любой ситуации, однако в любом другом клане кроме воров может подвести союзников;
- Келдорн — харизматичный, умный и всеми уважаемый герой, хорошо владеет самым мощным игровым мечом, однако очень неуклюж и неловок.
Помимо вышеперечисленных персонаже в команду можно взять Динайхер, Эдвина, Маззи, Аномена, Минск.
The Golem Laboratory[]
The party will be attacked by a number of Phase Spiders and Ettercaps when they enter this chamber.
This chamber is where Lavok builds his various golems, and a powerful Guardian golem is currently under completion. However, it still needs its head and one arm before it can be completed.
Exploring the room will turn up some Darts of Wounding, the third batch of Coal, and a Golem-Building Book.
The Golem-Building Book has Lavok’s personal notes as well as partial instructions for assembling the Guardian Golem, though the pages are burnt and do not entirely tell you what to do. Luckily it’s not complicated, you simply need to activate the 3 furnaces, have the Arm and Head pieces in your inventory, and interact with the console in the Lab to create and activate the Golem.
The purpose of this golem is as a defender of the Sphere against hostile intruders.
As such, though it ignores the party, it will race off to confront the Elder Orb, a large Beholder, that has taken up residence in the Bastion.
Activating the golem rewards the party with 23,500 XP; those who carefully partake in the ensuing battle can also potentially win the 14,000 XP for killing the Elder Orb, even as it ineffectively focuses on killing the unkillable Golem.
This room exits north to the Furnaces and east to the Rune Room. Be warned! There is a trap set in the eastern corridor.
Sendai’s Enclave[]
Travel to Sendai’s Enclave. You will see a woodcutter. If you want to avoid a long fight then you should try to kill the woodcutter now. If you want the experience, talk to the woodcutter. He will tell you that he saw some strange looking elves to the west. Go to the southwest area of the map and you will be attacked by Drow. Talk to the woodcutter again. He will tell you that he heard some voices by his wife’s grave. Go up north to the graveyard and more drow will attack. When you return to the woodcutter again he and several other drow will attack you. Once the woodcutter is dead, the entrance to the enclave will appear. Go through the entrance into the enclave, but watch out as there is a trap just in front the opening.
Fight your way east to the drow barracks. Along the way you will encounter many spiders, spore, drow and umber hulks. In the barracks you will have to fight more drow. Take the key from Thelynn’ss’ body. As you leave the area with the key, you will see a cut-scene where Sendai is being told of the intruder (you) and tells a commander to release her pets into the south tunnels and her slaves in the north tunnels.
When you are out of the barracks, you must choose whether to go through the north or south tunnels. If you go through the north tunnels you will have to fight the slaves that will keep appearing until you have killed the slave master. If you go through the southern tunnels you will have to fight many spiders and defeat the queen — Lashar’ra.
After making your way through either of the tunnels, you will at the crossroads. Go down the north-west stairs, kill the drow and enter Odamaron’s Lair. Defeat the lich Odamaron and take the wardstone off his body. As you leave with the wardstone you will see another cut-scene, this time where Sendai finds out that the intruder (still you) is Gorion’s Ward and tells Diaytha her priestess to stop the ward from getting further into her enclave.
When you are out with the Drow wardstone, go through the north-east door. When through Diaytha will set you a challenge which you must complete before you can reach her. The door on the right will open and you will have to kill two greater Earth elementals and Ogremoch, the prince of the Earth. Ogremoch has the ability to cast Earthquake. When the prince is dead, the door on the left will open. Through the door on the left you will have to fight Diaytha, a hive mother, a vampire, a demonknight and an Abishai. When Diaytha the priestess is dead, the door to the next area will open.
In the next area you will find Captain Egeissag. The beholder next to him will suggest a one-on-one pit fight. If you reject the offer you will have to fight the captain and his very hard to reach drow warriors. If you accept, the beholder will cast a geas on your party and the Captain’s drow warriors so when one person dies so will their allies. When the captain is dead, you will see yet another cut-scene, this time where Sendai is ordering her mind flayer ally Mithykyl to unleash his illithid against Gorion’s Ward.
Go through the exit in the arena and you will be in a mind flayer lair. You will be instantly attacked by Ulitharid and an Umber Hulk. Go through the door clearly opposite you, it is best if you do not go through the two doors closest to you, they are both dead-ends and hold back Vampiric Illithid. Go through the small passageway through the door opposite you and you will be attacked by Mithykyl, along with a couple of Ulitharids and Umber Hulks. Before you go into the next and last area, you should rest and prepare for a very tough battle.
In the last area Sendai will hail you and create seven statues of herself, each one on one of the platforms in the sanctum. After she is done talking she will teleport out and one of the statues will turn to life and attack. When the copy of Sendai is dead two drow will appear on the stairs out and another statue will turn to life. When all the copies of Sendai are gone, the real Sendai will re-appear and attack. When she is dead you will be sent to the Pocket Plane where Solar will ask you of your future and open another challenge.
The Rune Room[]
This room is dominated by four large runic designs on the floor, which seem to be feeding arcane power into a huge orb of energy-washed obsidian suspended in the center of the room. This setup creates a defensive seal around the stairway leading to the heart of the Sphere, and must be counterspelled to access the depths. Activating the runes in the right order will deactivate the wards; activating the wrong rune will blast whoever touched it with a Flame Strike spell and reset the puzzle.
The correct order to activate the runes is: Top, Bottom, Right, Left. Or: Northeast, Southwest, Southeast, Northwest, if one wishes to look at it like a compass. Completing the puzzle awards the party with 24,500 XP and grants access to the Sphere Core via the stairway to the South.
Heading east from the Rune Room leads to the Bastion Room, north to the Clock Room, or West to the Golem Laboratory.
Baldur’s Gate 3 классы
Превью Baldur’s Gate 3 Ларианом показали, что его первоначальный выбор классов очень похож на те, что можно найти в настольной игре, но каждый класс также будет иметь как минимум два подкласса на выбор.
Вот классы, которые Лариан показал до сих пор с их описаниями.
- Клерик — Клерики действуют как представители богов, которым они поклоняются, владея могущественной божественной магией во благо или во зло.
- Боец — Бойцы овладели искусством боя, носят доспехи как вторая кожа и владеют оружием с непревзойденным мастерством.
- Рейнджер — Рейнджеры — беспрецедентные разведчики и следопыты, оттачивающие глубокую связь с природой, чтобы охотиться на свою любимую добычу.
- Разбойник — Скрытный, опытный и смертоносный, универсальность разбойника позволяет ему взять верх практически в любой ситуации.
- Чернокнижник — Связанные своим договором со всемогущим покровителем, чернокнижники обменивают верность на сверхъестественные способности и уникальную магию.
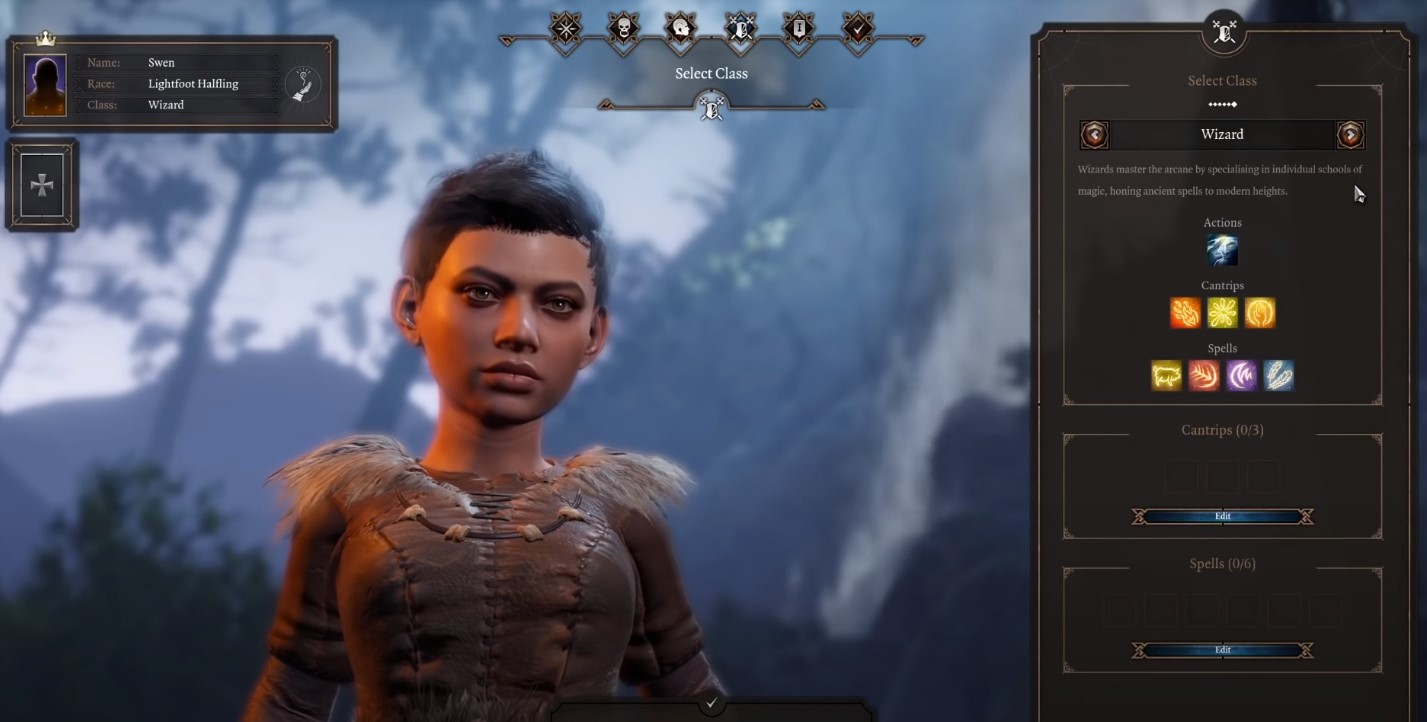
- Волшебник — волшебники овладевают тайной, специализируясь на отдельных школах магии, оттачивая древние заклинания до современных высот.
 (Изображение предоставлено Ларианом)
Ожидается, что во время раннего доступа появятся другие классы, но это те, которые будут доступны в начале. «Все классы из 5e Player’s Handbook будут включены при запуске», — сказал Лариан в AMA.
- Лучшие Билды Baldur’s Gate 3
- Вот Все Спутники Baldur’s Gate 3 На Данный Момент
- Получите Максимальную Мощь С Помощью Этих Лучших Советов Baldur’s Gate 3
- Все, Что Вам Нужно Знать Об Игровых Расах Baldur’s Gate 3
- Baldur’s Gate 3 Гайд По Классам
The Welcome Room[]
The first time the party enters this room, they feel the Sphere shudder and lurch; they have triggered an anti-intruder mechanism, causing the Sphere to planeshift away from Athkatla! Trapped inside the Sphere, they must press on. This chamber, a safe haven, contains three people in a similar situation; Reyna, Onvo and Ancan. Talking to them will reveal they are Knights of Solamnia, a holy order of Paladins, Fighters and Fighter/Clerics from the world of Krynn, who have been stranded here ever since Lavok visited their homeworld and they investigated his Sphere. They will provide some valuable information about the Sphere.
To the north of the Welcome Room lies the Aquatic Room, whilst the west wall has a door to the Caverns.
There is a Scroll of Khelben’s Warding Whip on the table here.
This is one of the rooms in which the party can Rest whilst they are trapped in the Sphere.
А что с сопартийцами?
Как и ранее, отряд героя можно пополнять праздно шатающимися NPC, каждый из которых будет преследовать собственную цель присоединиться к отряду. И если в 1-ой главе Baldur’s Gate 2 мы встречаем старых знакомых, которые прошли сквозь огонь, воду и медные трубы вместе (за исключением, пожалуй, вора), то дальше начинается ну совсем интересно.
Хотите по-быстрому собрать пачку денег для выкупа Имоэн? Налия предложит не только отличный квест, но и с удовольствием составит компанию группе приключенцев. Ну, вы поняли: в этом жестоком фэнтезийном мирке аватару есть из кого выбрать.
Разумеется, при несовпадении характеров наши подопечные будут собачиться. Также они будут ныть, скучать, требовать водки приключений. В общем, ведут себя типично для каждого мало-мальски приличного фэнтези. Кстати, они не против вступить в перепалку и со своим главарем, что не может не радовать. Уж очень рельефные и разнообразные характеры прописаны в Baldur’s Gate 2.
In this chamber, Lavok directs the path of the Planar Sphere. Angered by your besieging of his home, the malevolent wizard attacks the party. He is a difficult battle, being high enough that he can cast spells like the lethal Abi-Dalzim’s Horrid Wilting.
Once defeated, Lavok, mortally wounded, regains his senses, and explains to the party that only he has a chance of returning the Sphere back to Athkatla, begging them to let him go home and see the sun of his birth-world one last time before he dies. As the alternative is being stranded in the Sphere, which he warns is currently stuck on a layer of the Abyss, for the rest of their lives, the party must agree. Lavok explains that the Sphere has exhausted its power, and needs the heart of a powerful Tanar’ri as a fuel source. As they have landed in the Abyss, it shouldn’t be too hard to find one.
Once the party has repowered the Engine, they must return here. Lavok will return the Sphere to Athkatla, draining the power of the Engine entirely to do so, and then plead with the party to let him feel the sunlight before he dies. If they refuse, he gives up and dies, leaving the quest complete. If his wish is granted, he dies gratefully, awarding them with 45,500 XP each and his Ring of Acuity.
The confrontation with Lavok goes differently depending on whether or not Valygar is in the party.
This room connects to the Bastion by a door in the south, to the Mushroom Grove by a door to the west, and to the Tech Room by a door to the north.
Balthazar[]
When you have defeated both Abazigal and Sendai, return to Amkethran and find a way inside Balthazar’s monastery. From this point on, any monk or mercenary here will be hostile, as you have been made a public enemy. There are three ways of breaching the church:
- Attack the gates
- Go to the smugglers cave and get help from Saemon Havarian
- Go through the graveyard
If you go for the gates, you will have to kill the leader of the monks and take the key off him. Note that the monks outside the gate will keep re-spawning.
If you want help from Saemon, you need to talk to him in the smugglers cave. He will take you into the monastery and meet up with some more monks. He will leave you there to fight them.
If you want to go through the graveyard, Speak to Zakee Rafeha, the tavernkeeper, and he will tell you that Faheed and Majira might know a way in. Speak to them in their house on the cliff and you will be given the Graveyard Key. Enter the graveyard, click on all four pedestals inside, and defeat the enemies that appear. The Graveyard Key will open one of the door that will lead to the Monastery.
When inside the monastery, you should prepare for battle now before moving, as when you start to go up the stairs, you will be instantly sent in front of Balthazar in his throne.
Balthazar will say that he plans to take Bhaal’s power for himself, but not to cause chaos. He wants to take Bhaal’s power and then perform a suicide ritual to kill him and Bhaal together. He will say your death is a necessity and attack.
Balthazar has the standard monk abilities as well as additional abilities which you wouldn’t be able to get. These abiilties are:
- Strength of 22.
- Regenerates 6 hit points per second (like a Ring of Gaxx)
- Shadow Stance (Invisibility).
- Second Wind (Dimension Door and Heal in one blow).
- Solar Stance (a Sunfire spell that also kicks opponents back).
- Lunar Stance (a spell trigger that releases Bigby’s Crushing Hand, Magic Missile, and Greater Malison at once).
When Balthazar is dead, you will be yet again be summoned to the Pocket Plane. This time you will learn of Melissan’s deciet towards you and the five, and who she really is.
When you have killed Balthazar and completed the five challenges in the Pocket Plane, go through the exit one last time and Chapter 10 will begin.
Hidden Refuge[]
This entire area is a wild surge zone.
2000 xp each party member upon arriving here. Neera is near the starting point if you dismissed her earlier, and in order to get in the refuge, she must be in party. It’s impossible to have both her and Edwin in the party at the same time, and Edwin will leave immediately at this stage if Neera joins.
After meeting Hayes and Telana at the gate, your next move is to find Daxus Taralom, but before that, explore a bit, people around the camp have their own affairs, it’s recommended to complete these mini quests before triggering Daxus’s rescue in Delosar’s Inn for more rewards there and after.
- Knocktor the Fizzled — Talisman of the Hearthfire (3500 XP)
- Mironda — A new beer for Mironda (3500 XP)
- Barad Ding — Barad Ding’s eight cats
- Amanis Khal & Kirik Khal — Amanis Khal’s Missing Son (3500 XP)
- Mereth — Mereth’s hairband
- Zaviak — Where’s Wilson?
- Reginald — Pester him then go around, kit him (no need to turn AI off), after a while he’ll cease attacking, wait a bit for him to return to his original spot then talk to him again
Treasures around the camp:
- (x=1240 y=758) 2 RNDTRE01.itm, RNDTRE02.itm
- (x= 1204 y=919) RNDTRE01.itm, RNDSCR01.itm
- (x=1371 y=1110) RNDMAG01.itm
- (x=1331 y=526) RNDTRE01.itm, RNDTRE02.itm, RNDSCR02.itm